The Fox Wedged mortise and tenon combines the strength of a wedged tenon with the concealment of a stub tenon. Accuracy is essential to ensure tight joint lines and a well fit 'dovetail'.
Two saw kerfs are sawn into the tenon, parallel to the edges and close to each edge (shown by the dotted lines)
A small hole is bored at the base of each saw kerf, which provides stress relief and space for the wedge tip to crush if necessary
The ends of the mortise are chopped back at an angle to match the wedges, so that the tenon will distort to fill the extra space as it is driven home
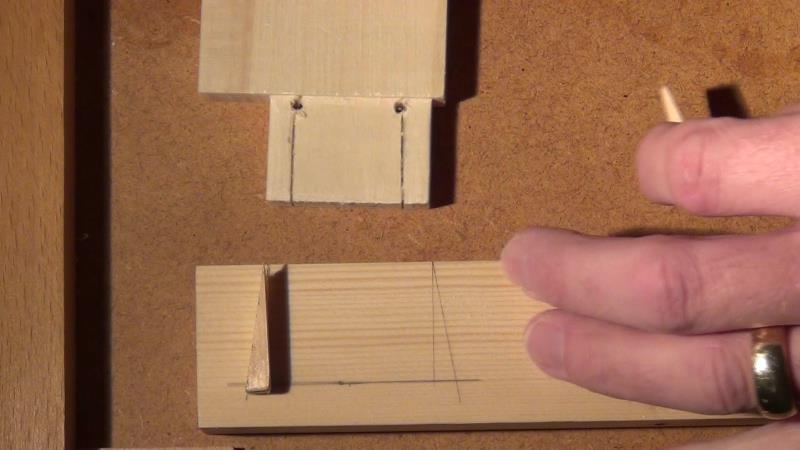
Pencil in the stub mortise profile, and then draw in the back cut ends
Here you can see the gap left below the tenon to ensure the joint will fit tight at the shoulders
Prepare a snug fitting, long grain, piece of wood, from which to cut the wedges
With this piece held fully in the mortise, knife the shoulder line on to it...
...which gives the wedge length
Mark the tenon for saw kerfs and holes
Drill the two holes, right up close to the tenon shoulders
Saw the two kerfs to intercept with the holes
The tenon should now look like this
Measure the width of the saw kerf. This is extra space that needs filling by the wedge
With a bevel gauge set to the back cut angle (1:7 is a reasonable guide), mark out the first wedge. Remember to add the width of the saw kerf to the wedge
The second wedge can utilise the sloped cut off the first
After cutting the wedges, double check that they match the layout
Insert the wedges a tiny bit...
And ensure that the tenon is a good fit in the top of the mortise
Using the bevel gauge as a guide...
...chop back the angled ends of the mortise
Check the angle with the to of the bevel gauge
Now it's time for assembly. Apply glue to the mortise...
...the tenon...
...and the wedges
Insert the tenon, with wedges pinched in the saw kerfs, into the mortise
Gradually push the tenon into the mortise, forcing the wedges further into the saw kerfs
You may need to hammer the tenon in, up to it's shoulders, or use a clamp
Once the shoulders are tight, clamp the joint and leave to cure
If practising, saw the cured joint through...
...to check the fit
Now watch the video:
1 comment:
Anonymous
said...
Very interesting concept. Looks like a very reliable and durable joint. Nice erecting with cutting the completed joint apart to prove the concept. Thanks for sharing!


1 comment:
Very interesting concept. Looks like a very reliable and durable joint. Nice erecting with cutting the completed joint apart to prove the concept. Thanks for sharing!
Post a Comment